Tenant Metadata
Map tenant IDs to names, plans, and other identifiers using metadata
Tenant metadata is a tool to associate the tenant IDs of your customers with meaningful user data, such as external IDs, licenses, or plain-text names.
This is useful if you use UUIDs or other non-readable strings as tenant IDs. With metadata, you can associate an unreadable tenant ID b3ce717c-9ee3-4c80-a3d1-de42f3563496 with the company name Apple, Inc and Stripe Customer ID cus_P5iEJpWPKP3xXI.
Tenant metadata is always accessible via:
- API
- Job Lifecycle webhooks
- Tenant configs, for use in your ETL scripts
- The admin panel Tenant dashboard
You can also add metadata to tenants via the widget, API or your hotglue admin panel.
How to add tenant metadata
There is no central “custom field” list in hotglue. Metadata is added per-tenant, and types are not enforced. That means that you can add any metadata field to any tenant without validation
Using the widget
Metadata can be added using the built-in tenantMetadata option in the widget. When any widget function is called with a tenantMetadata option object, the tenant ID will be associated with your chosen metadata. This is supported in the Javascript widget (hotglue.com/widgetv2.js) or in React versions ≥ 1.4.9.
For example, you can add tenant metadata using the javascript HotGlue.link function as below:
HotGlue.link(tenant, flow, connector, false, {
        tenantMetadata: {
            "Name": "OpenAI",
            "Email": "sama@openai.com"
            "Stripe ID": "cus_P5iEJpKWPP3xXl"
        }
    }
)
🚧 Note: tenantMetadata overwrites existing metadata fields
When you pass tenantMetadata to the widget, hotglue overwrites your metadata object with whatever is passed to the widget. If you do not pass all metadata values to the widget, this becomes a destructive action.
Using the API
Metadata can be added with a PUT to the /metadata endpoint. Learn more about tenant metadata APIs here.
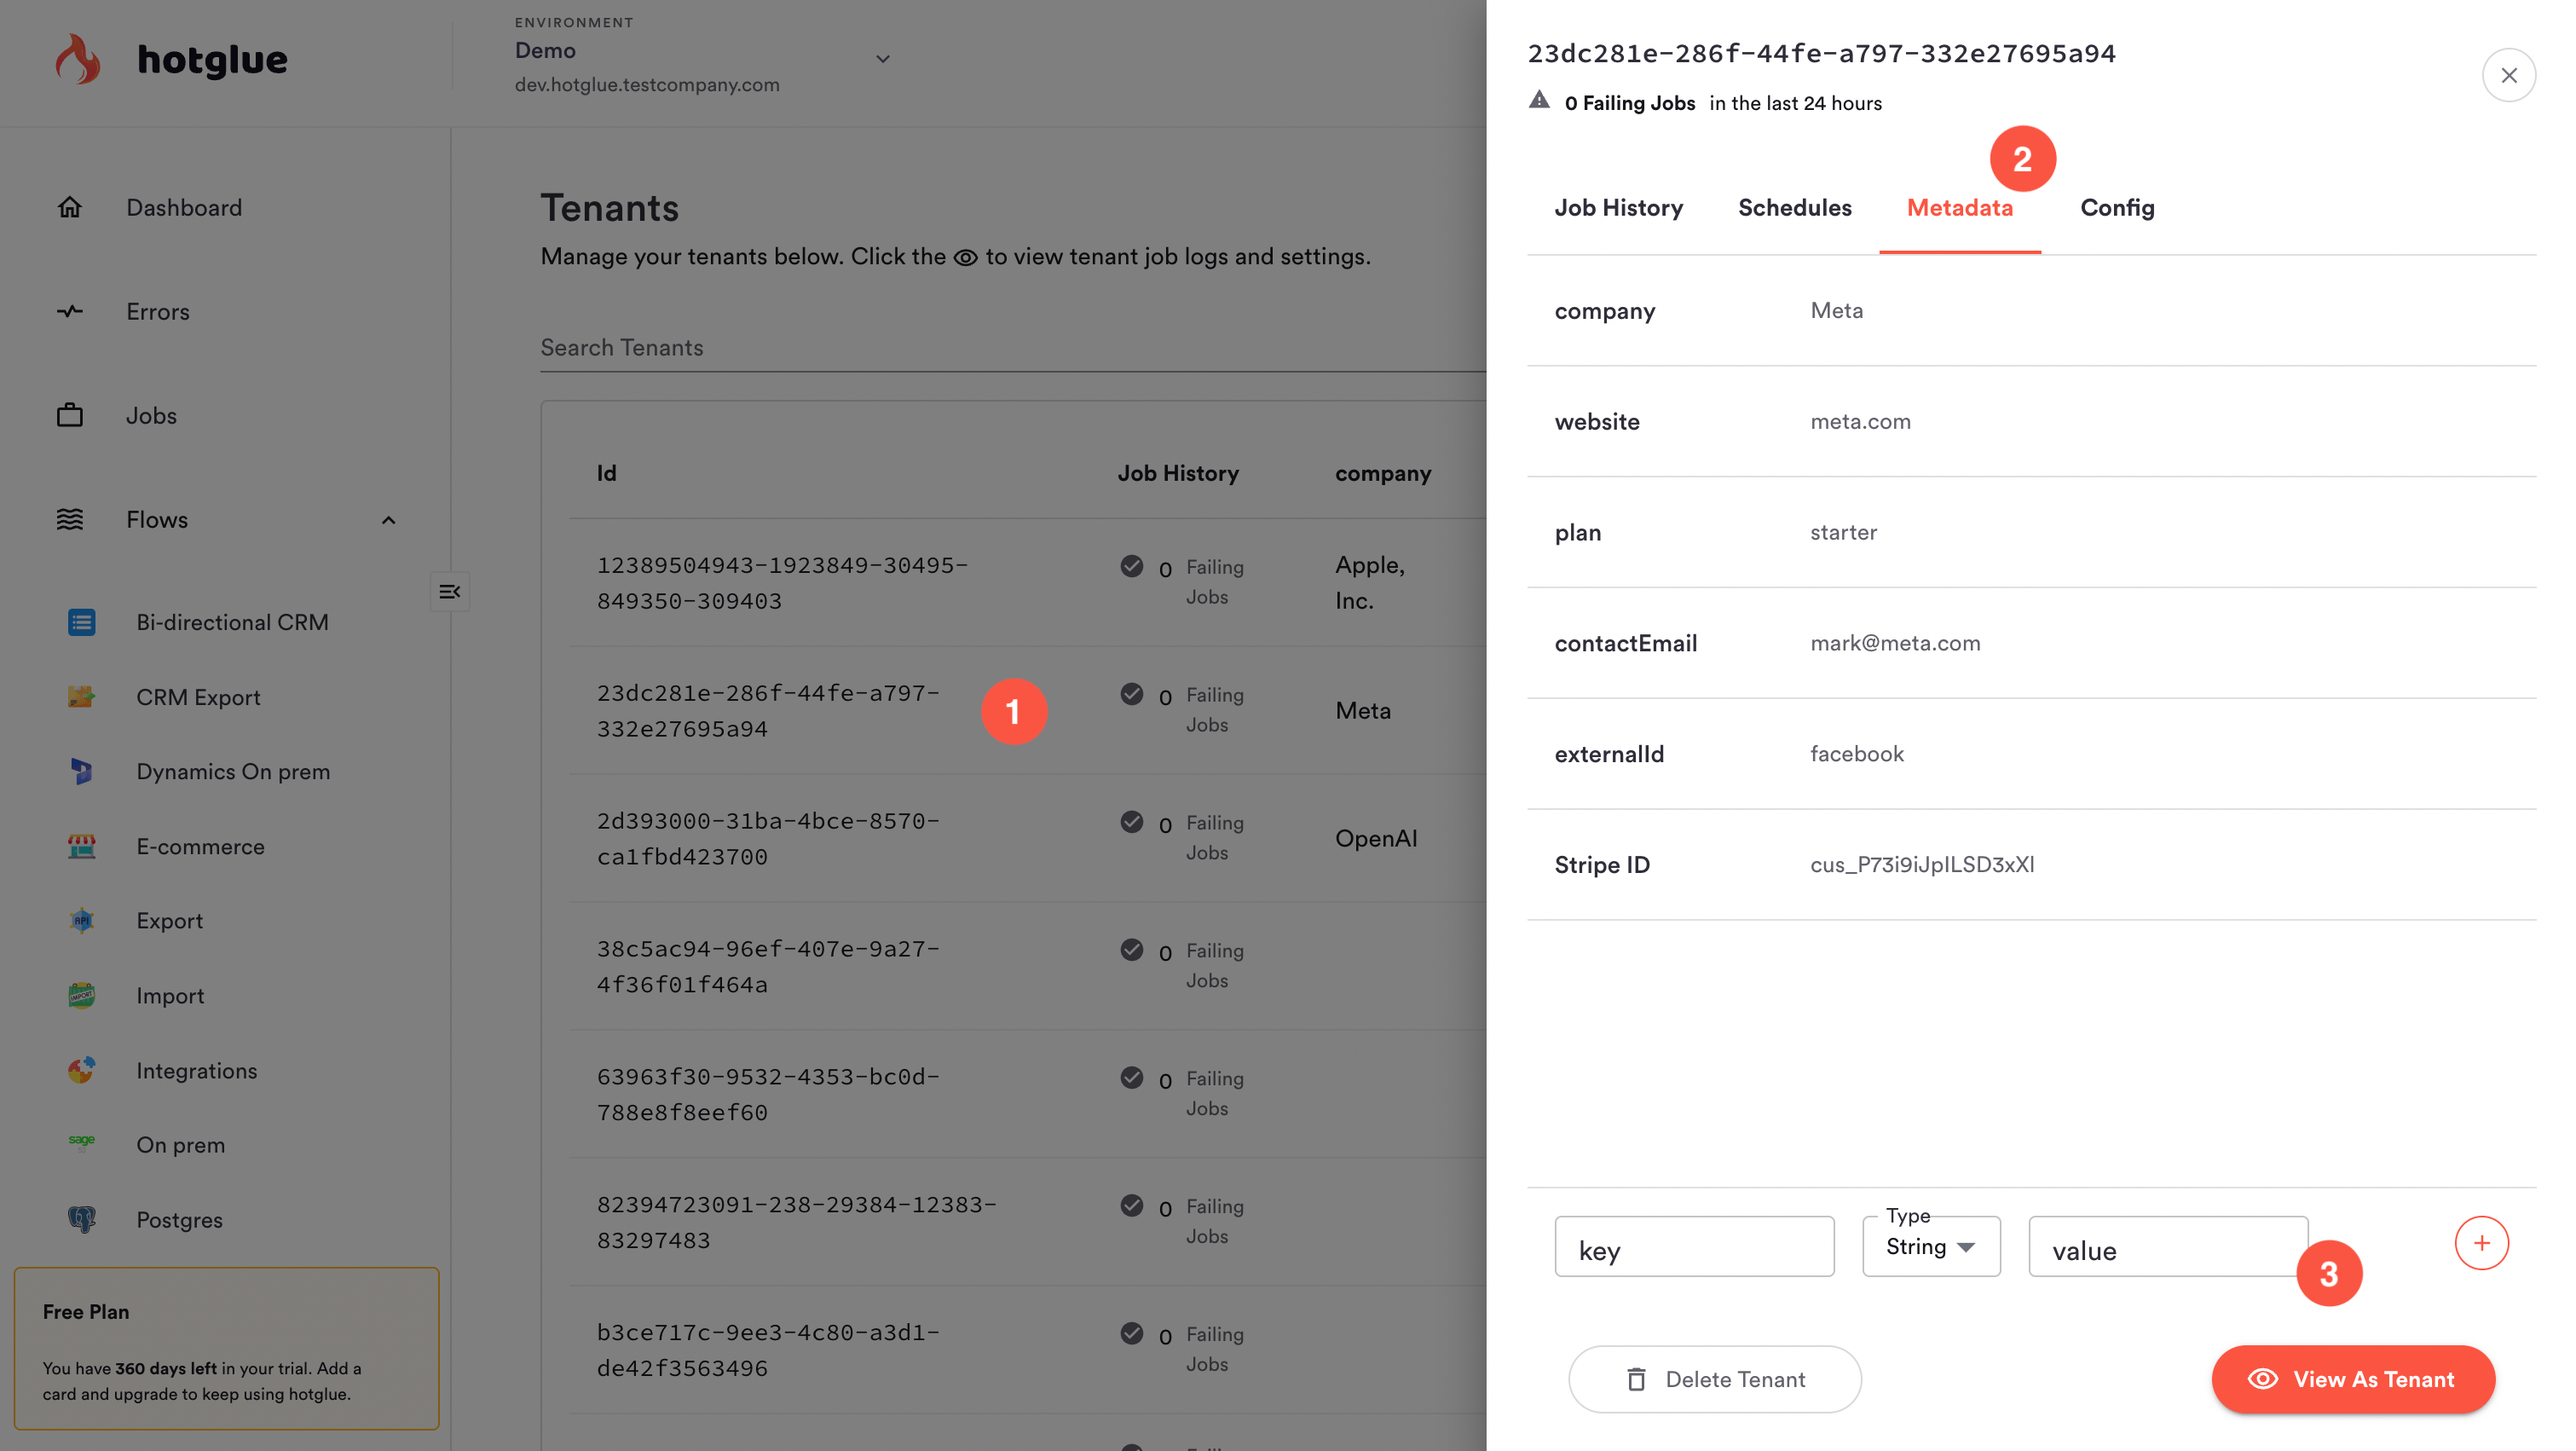
Using the admin panel
Metadata can be added directly from the hotglue admin panel. To add metadata:
- Navigate to the tenant management dashboard
- Click on any tenant (not the 👁 icon) to bring up the tenant management panel
- Navigate to the Metadata tab
- Type in a field name, type, and value
- Click
+to add your new metadata field

You can then configure which metadata is shown by clicking Edit Columns in your Tenant list, or edit metadata by clicking the pencil icon next to a field in your tenant management panel.
Differences between tenant metadata vs. tenant config
Tenant metadata is stored in the tenant config. That means that you can technically utilize metadata in any way that you use the tenant config—for example, as flags in ETL scripts. Inside the tenant config, metadata is structured like below:
{
  "hotglue_metadata": {
    "metadata": {
      "Company": "Apple, Inc.",
      "External Id": "appleinc",
      "Website": "apple.com",
      "Contact Email": "tim@apple.com",
      "Churn Risk?": false,
      "Stripe Plan": "enterprise",
      "Stripe ID": "cus_P5iEJpWPKP3xXl"
    }
  },
  // other tenant config objects go here
}
The primary difference is that metadata is exposed in more places (webhooks, admin panel) and it cannot be nested. This makes it an excellent candidate for simple user information like plans and company names, and a poor candidate for secret keys or nested configuration objects.
| Properties | Tenant Config | Tenant Metadata |
|---|---|---|
| Suitable for storing secret keys | ✅ | ❌ |
| Supports nested objects | ✅ | ❌ |
| Can be managed via the admin panel or API | ✅ | ✅ |
| Can be managed via widget embed code | ❌ | ✅ |
| Sent in job lifecycle webhooks | ❌ | ✅ |